How to Import & Export MySQL Databases?
How do I import an SQL Dump file into MySQL database?
1. Using Import SQL Wizard
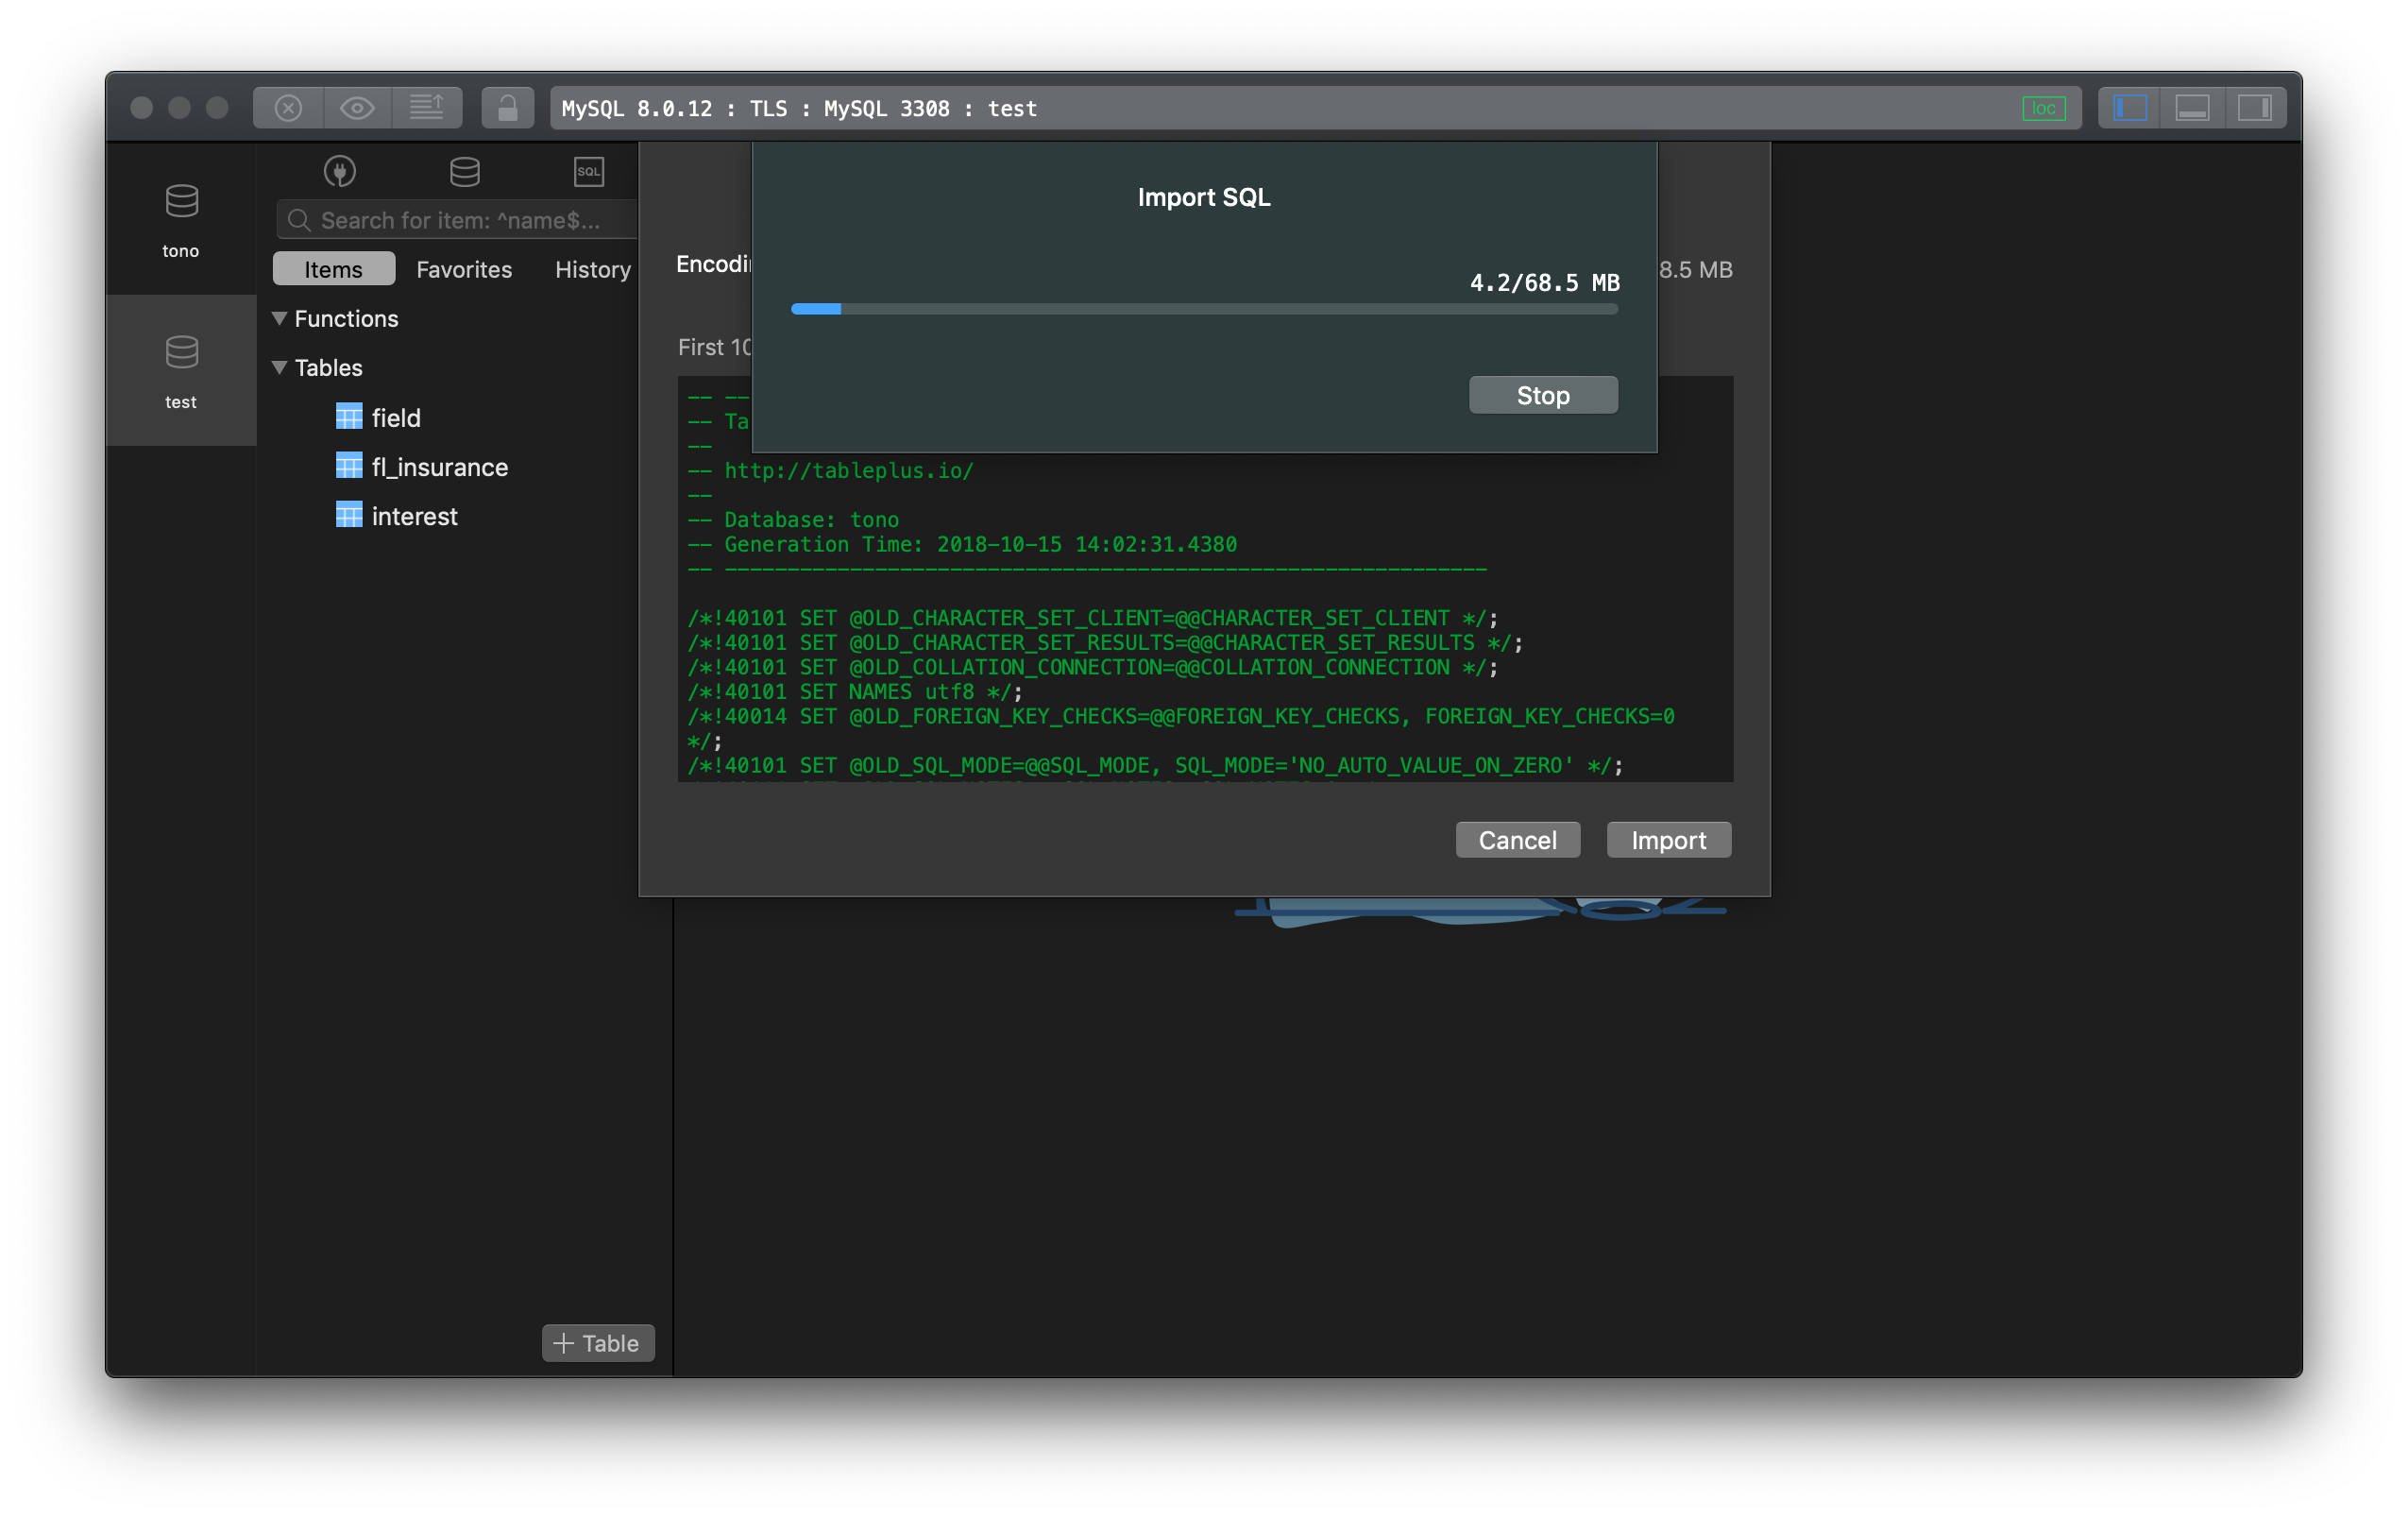
Previously, you can import and *.sql file to use with your database in TablePlus by dragging the file into the query editor and execute it. It works just fine for the small sized file, but for a huge file, it gives the app a hard time executing it.
Now TablePlus has already supported Import SQL Dump.
Note:
- You have to update the app to the latest version to make sure the app runs properly.
- Careful: Importing a
*.sqlfile may overwrite your existing data!
To import an SQL dump file:
- Connect to your MySQL database
- Choose
Import>From SQL Dump…from the File menu. - This will bring up a dialog box, select the file on your file system that you would like to import, then click
Import. - Your database will now be updated. Click the
Refreshbutton (Cmd + R) if needed.
2. Or using the Restore feature
It uses the binaries of the database for the job, and it’s compatible with the latest version of MySQL.
- If you are in the welcome screen, click on the restore icon.
- If you are connected to the database, Choose File >
Restore…from the menu - Choose connection and database to backup, or add any options if you want.
- Click
Start restore… - This will bring up a dialog box, select the file on your file system, then click
Start Restore.
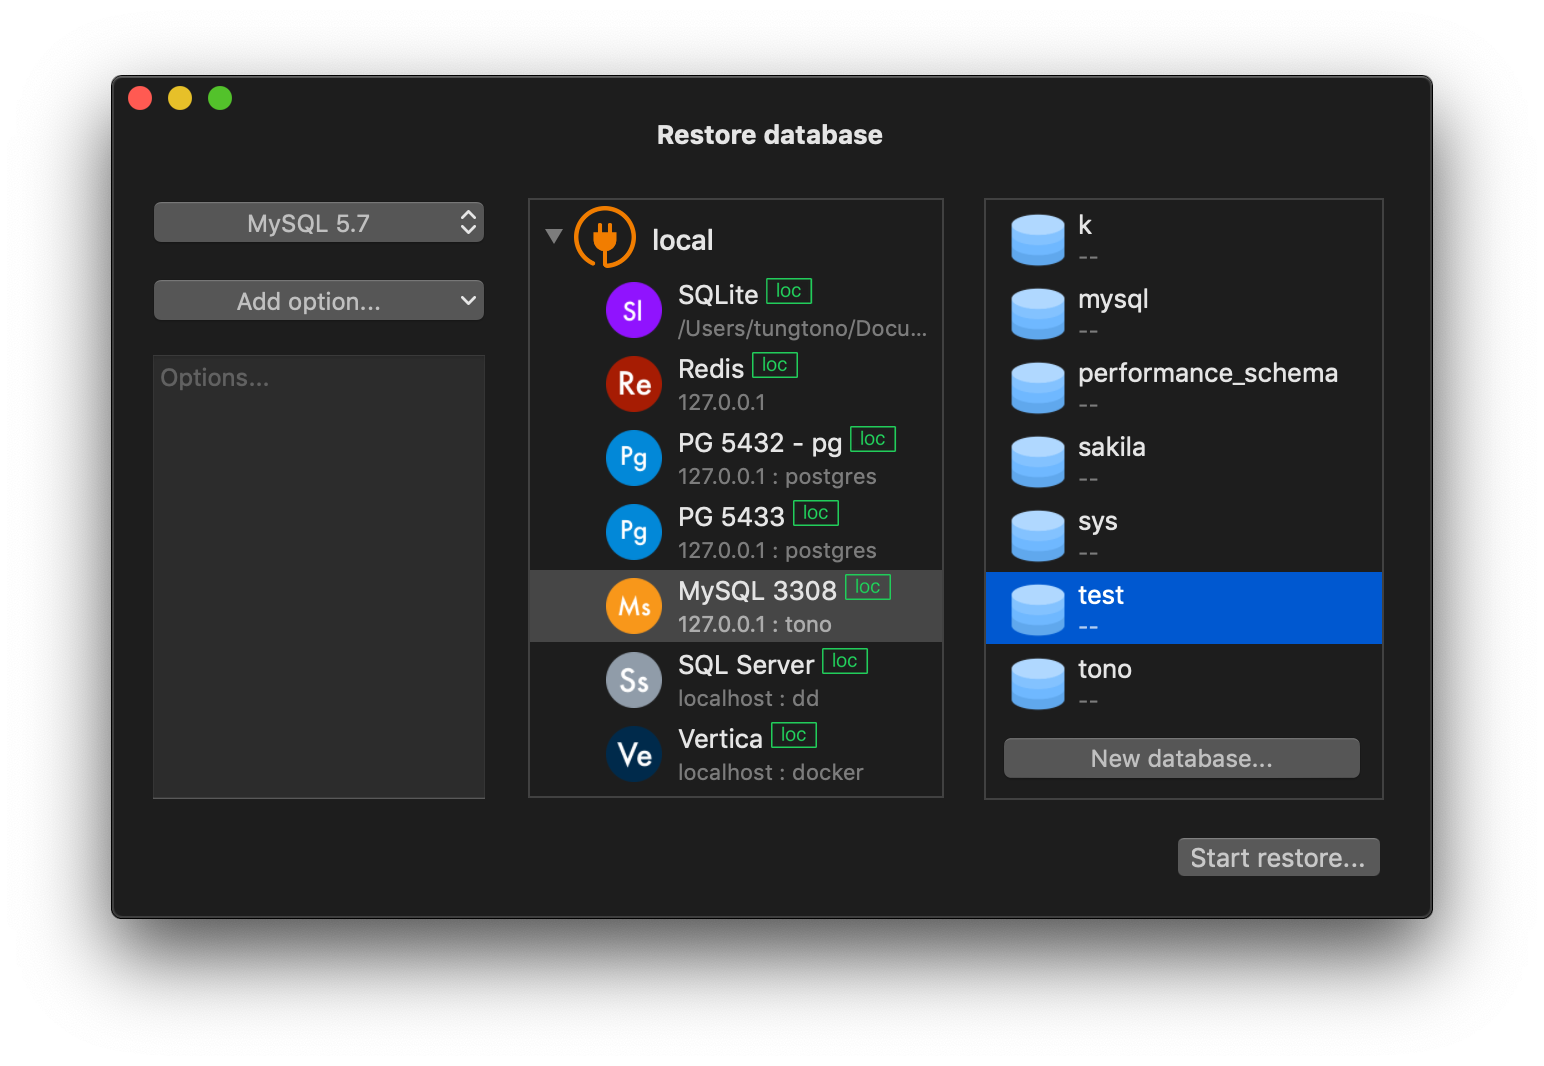
And your database now is updated.
How do I save the table structure/table content as an SQL Dump file?
1. Using the Export Wizard
To export an SQL dump file of the table structure or contents:
- Connect to your MySQL database.
- Select tables needed to export
- Choose
Export…from the File menu. This will bring up a dialog box where you can choose output data. - Choose the SQL tab
- Choose to include table content or structure, or drop table if exists command in the Dump file.
- Click ‘Export…’
- Choose the destination folder to store the exported file from the dialog box.
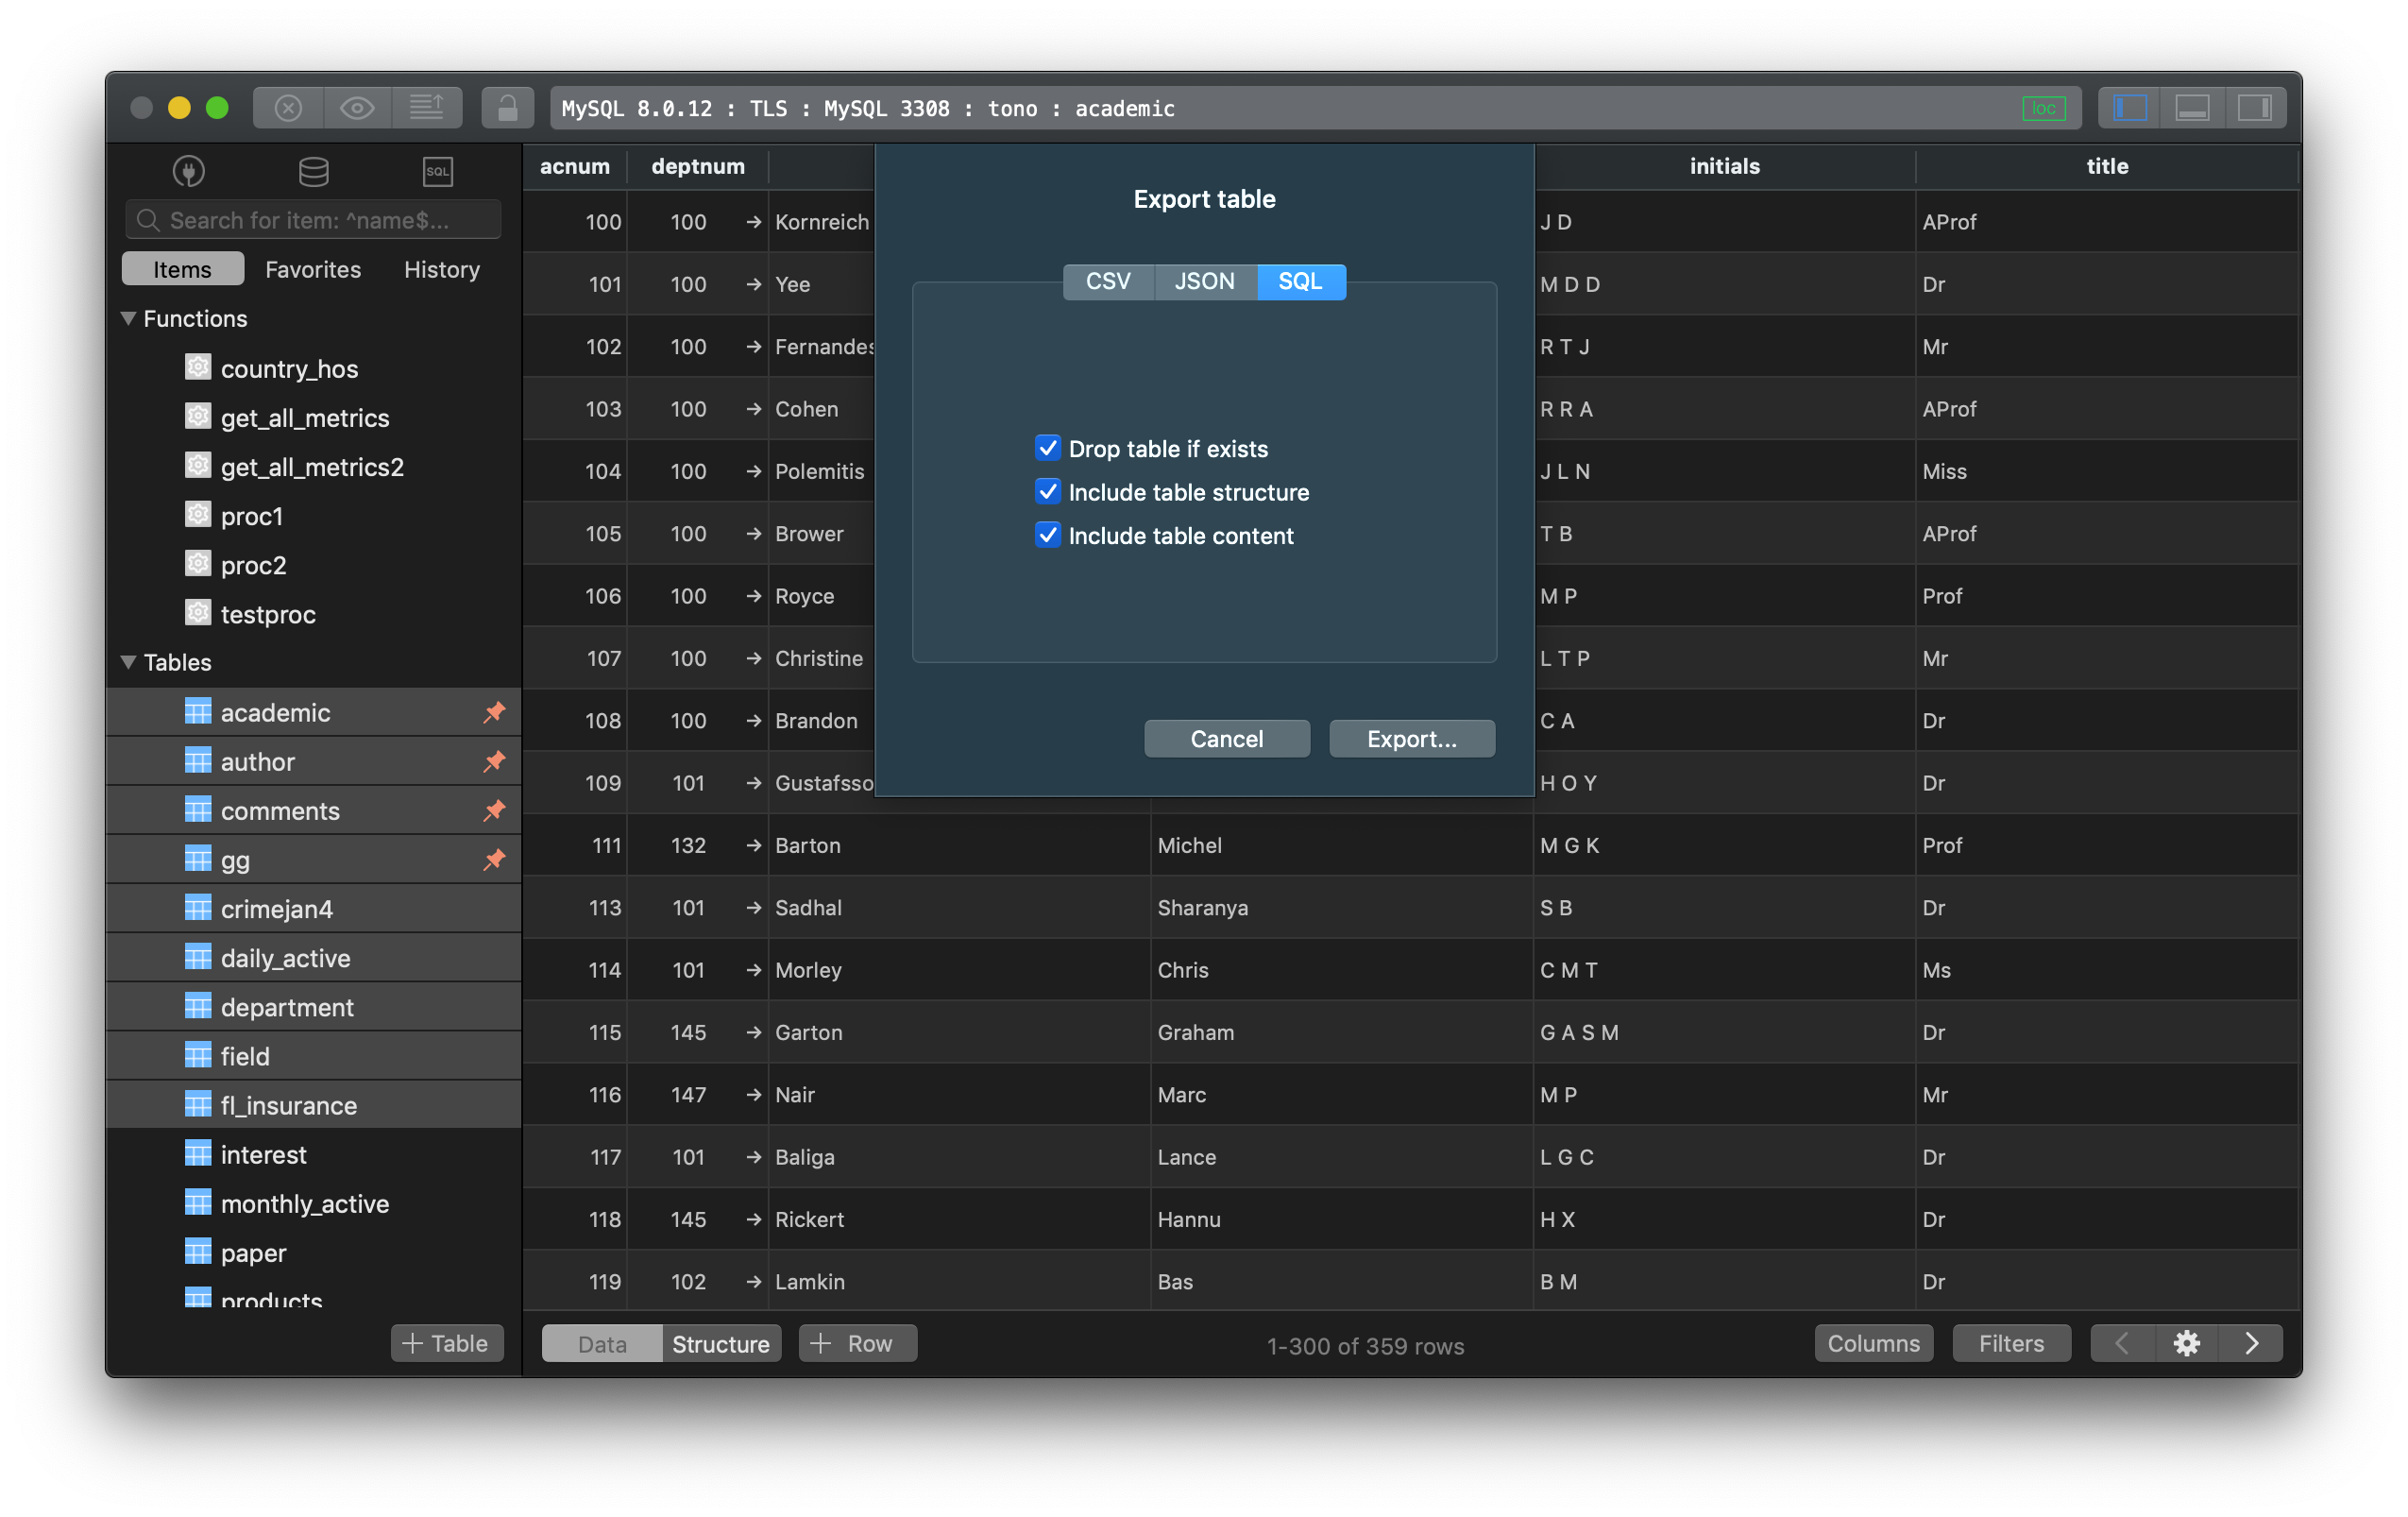
And now your tables are exported on your destination folder.
2. Using the Backup feature
- If you are in the welcome screen, click on the backup icon.
- If you are connected to the database, Choose
Backup…from the File menu. - Choose connection and database to backup, or add any options if you want.
- Click
Start Backup… - Choose the destination folder to store the backup file from the dialog box

And now you have a dump file of your entire database stored in your destination folder.